-
 429aa6f6
Contributing to the NEMO reference code
- Introduction
- Step 1: Approval from relevant Working Group
- Step 2: Addition of your development to the Annual Work Plan
- Step 3: Following NEMO development Standards
- Step 4: Access to the NEMO Forge
- Step 5: Your own branch on the NEMO External Contributors fork
- Step 6: Make changes to your branch on your local machine
- Step 7: Bring your branch up to date with the main
- Step 8: Test your branch using SETTE
- Step 9: Create a merge request
- Step 10: Update of documentation and development included in the NEMO reference
- The NEMO Forum for Q&A
Introduction
As an expert user, you may wish to feed some of your developments back into the NEMO reference code and therby become an "external contributor". This could be an attractive opportunity to ensure the long term use of your work and your efforts will be recognised as you will become a co-author on the next NEMO official release.
It is important to note that due to the large user base and variety of applications of NEMO, the reliability of the code is paramount and thus standards must me met.
To ensure that the candidate external developer has all the tools necessary to make a valuable contribution to NEMO, the following protocol has been put in place.
Note that the effort required to prepare a development for distribution within the NEMO reference code is much larger than simply writing/adapting code for your own personal use. Before proceeding, we suggest that you reflect on how much time you are willing to dedicate to this task and discuss it with your line manager. That said, if you do decide to proceed and are motivated to meet the required standards, your will be rewarded by your work having longevity and community accreditation.
Step 1: Approval from relevant Working Group
The NEMO Long Term Development Strategy is organised into chapters authored by Working Groups. These are collections of experts on topics that are viewed as being of particular importance to current and future NEMO developments. Before gaining privileged access to the NEMO forge, it is important that you run your development past the Working Group leader that is most revelant to your area of interest. This will enable you to get feedback on your proposed development or allow you to adapt/improve your existing development to be in line with NEMO requirements.
We advise that you refer to the NEMO Long Term Development Strategy to identify the correct Working Group contact, and send the relevant person a short note describing your development.
Once your development has been determined by the Working Group as being of value to NEMO, you will then be put in contact with a memeber of the NEMO System Team who has expertise in your area of interest.
Step 2: Addition of your development to the Annual Work Plan
The NEMO Annual Work Plan is a document used by the System Team to coordinate developments expected to take place during a calendar year. Once your development has been approved in theory by your Working Group leader, and you have discussed it with the NEMO System Team contact assigned to you, your task will be added to this document.
Step 3: Following NEMO development Standards
As mentioned previously, the reliability and readability of the NEMO reference code is of utmost importance to developers and users alike. As such, it is vital that you refer to the chapter on "Coding Rules" in the the NEMO Ocean Engine Reference Manual, and the module_example.F90 template for coding in Fortran for NEMO. If your development does not comply with these standards, it will not be included in the NEMO reference.
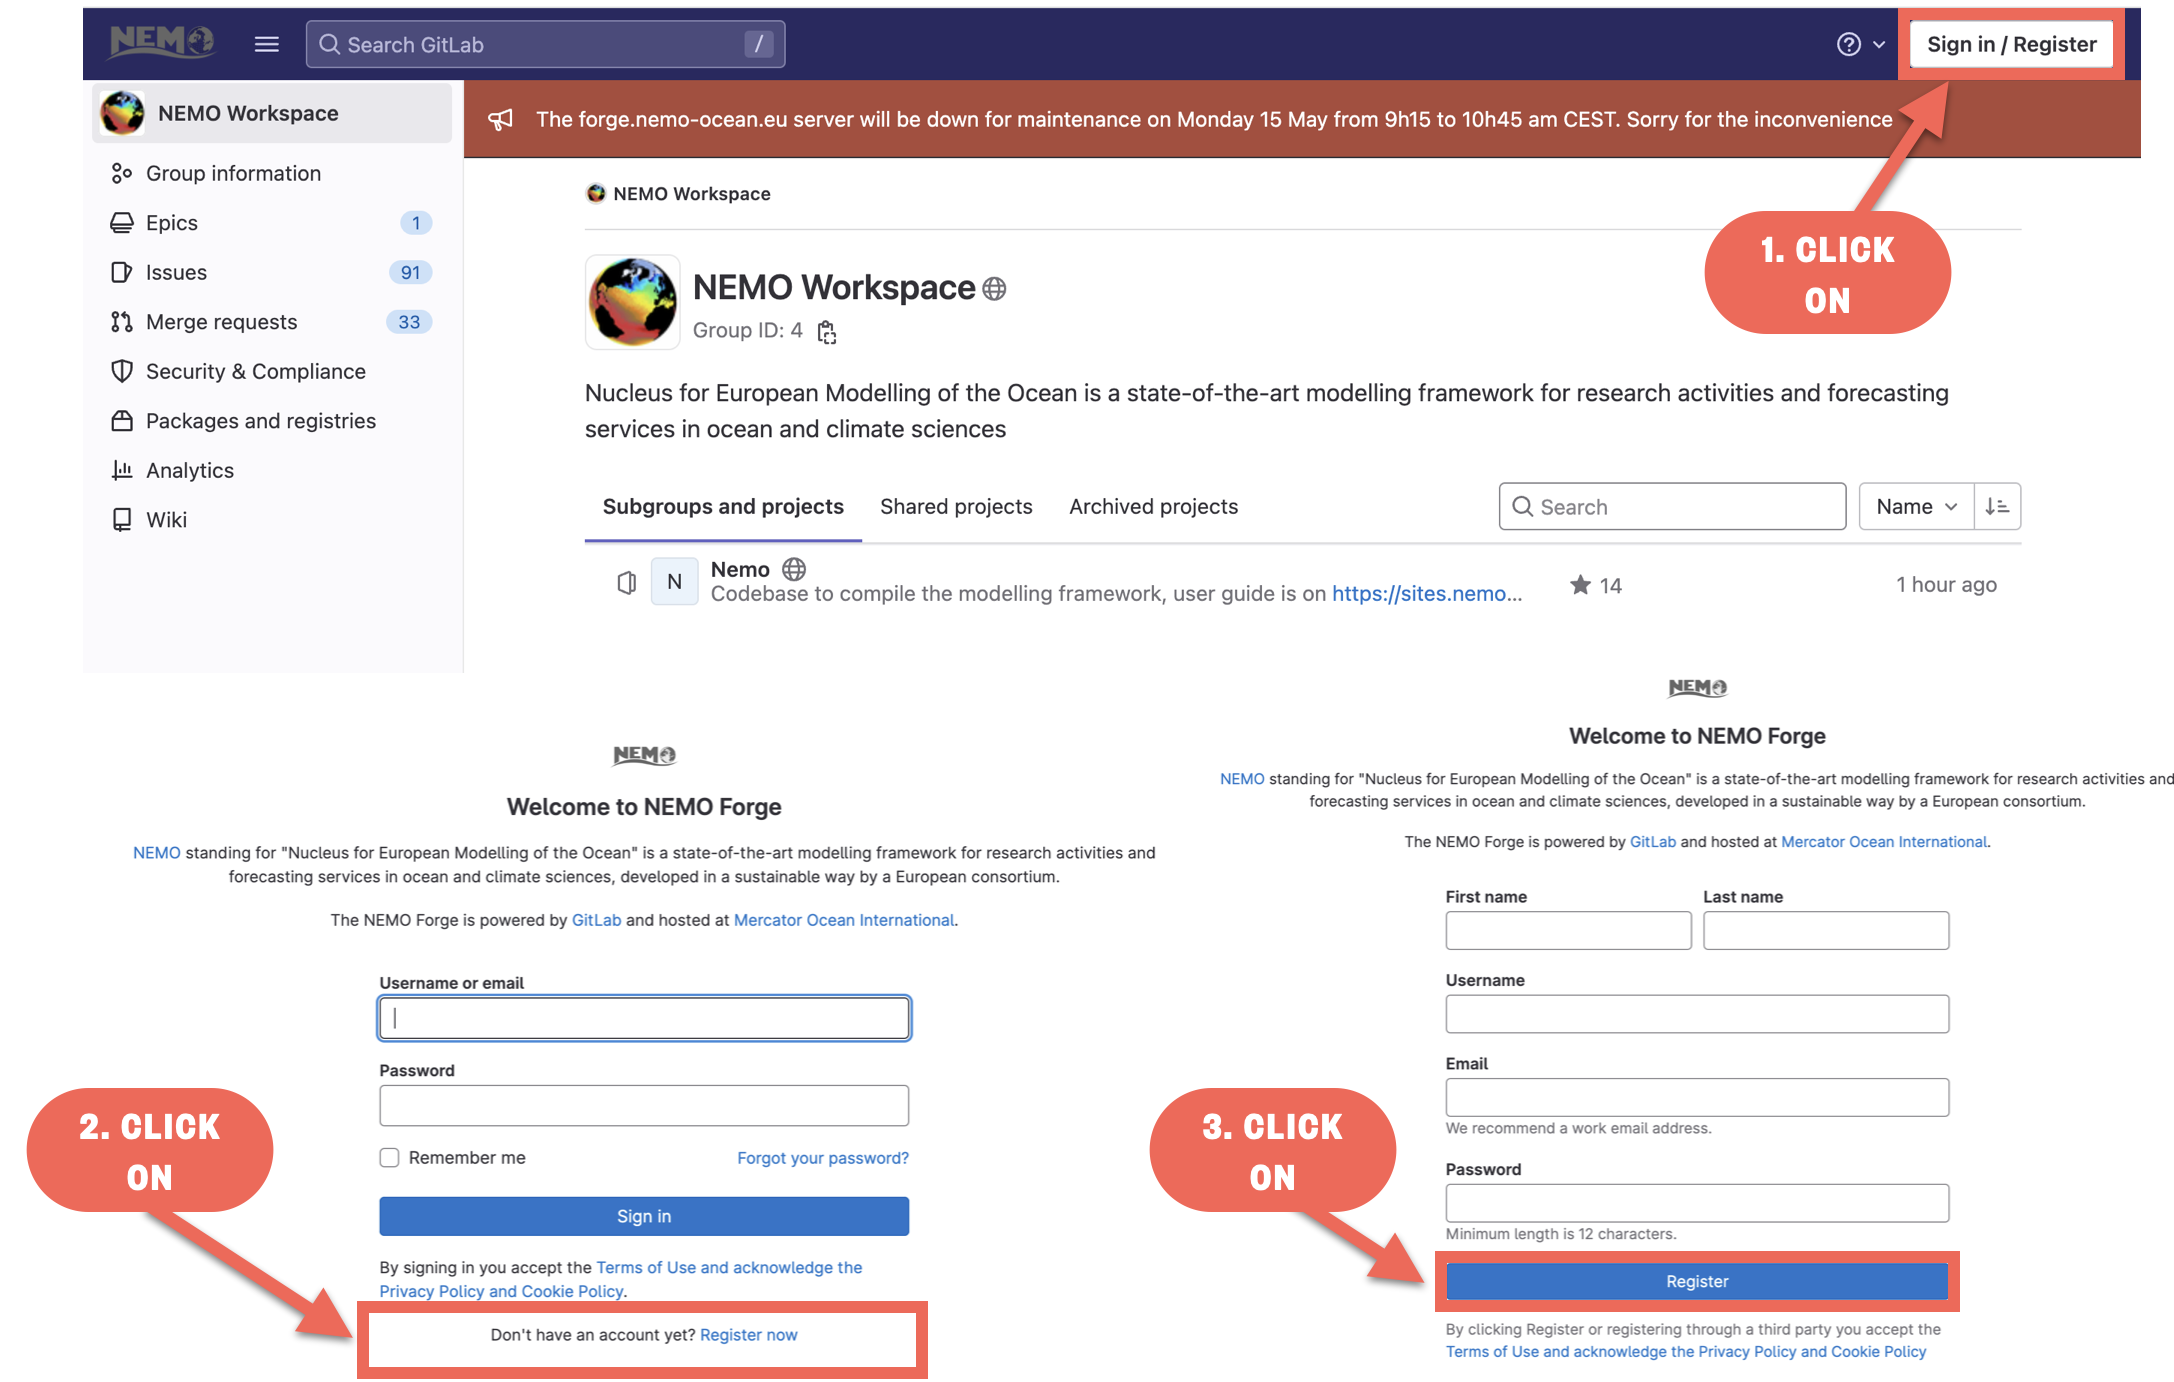
Step 4: Access to the NEMO Forge
- Register as a user on the NEMO Forge
- Double authentication is required for all access to the forge. Please download an auth app with your mobile phone, e.g. Authy, and link with the NEMO forge by scanning the QR code
- An External Contributors fork of the evolving NEMO main has been created to provide a space for candidate developments not made by the official members of the NEMO System Team. This fork is updated with the main at regular intervals and so the purpose is not to merge your developments to this fork, but to use this space as a sandbox for testing and validation before your branch is transferred across to the NEMO main.
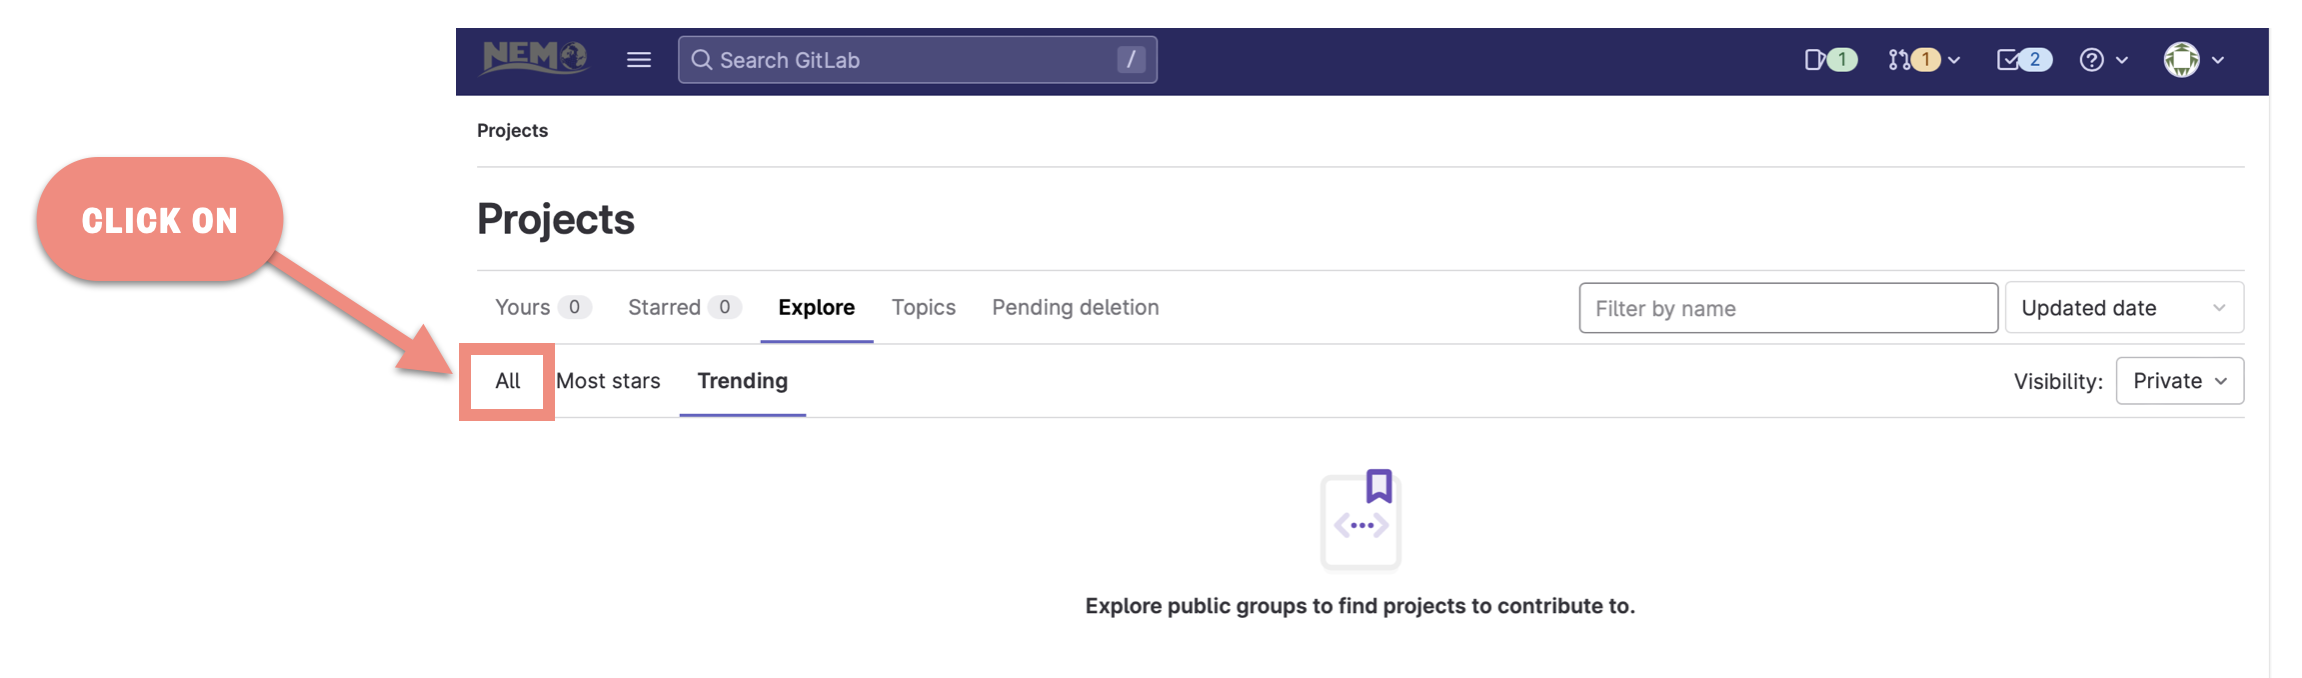
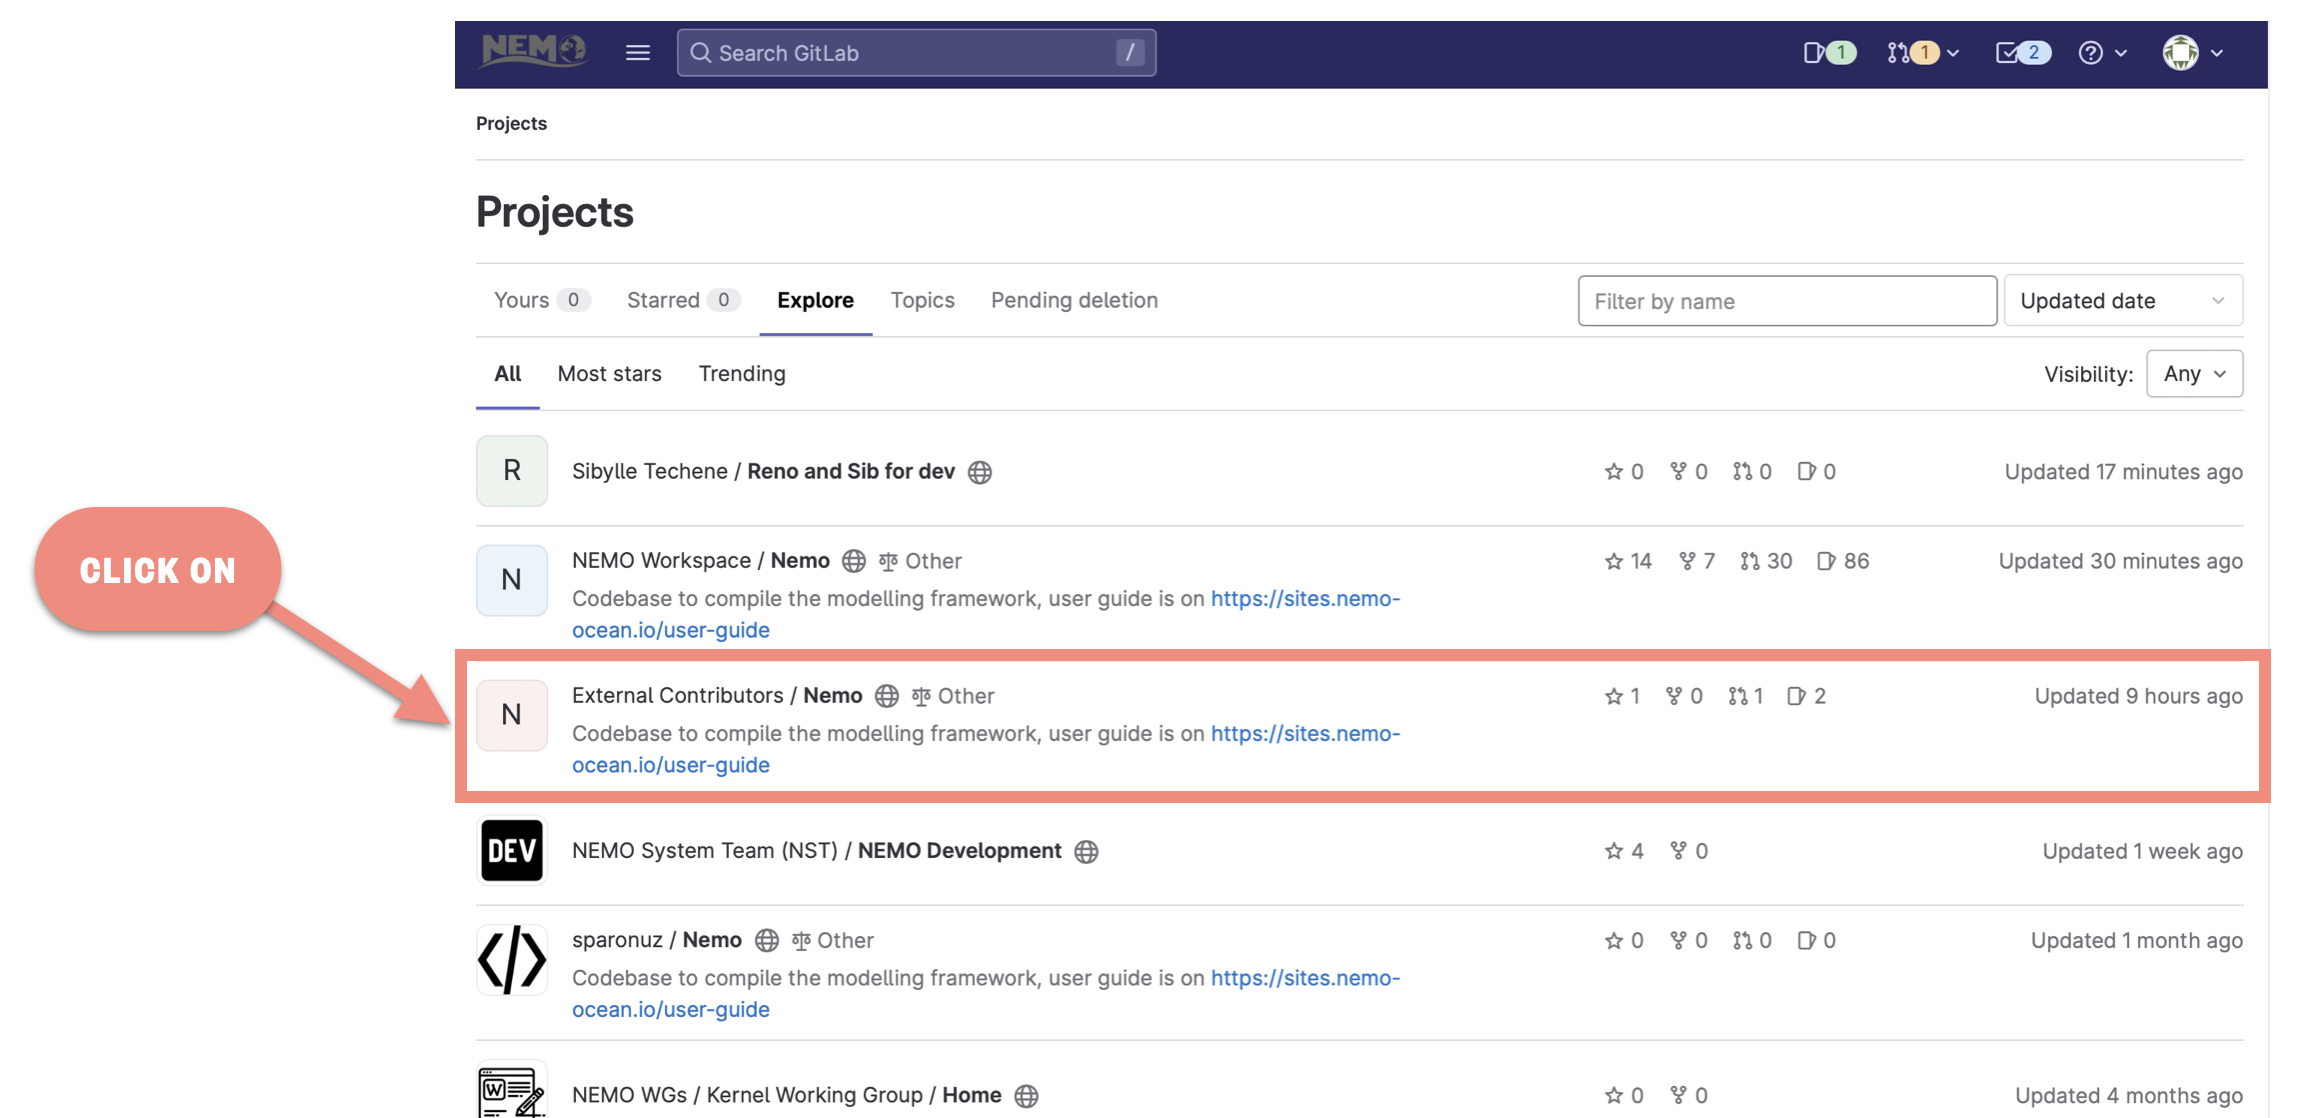
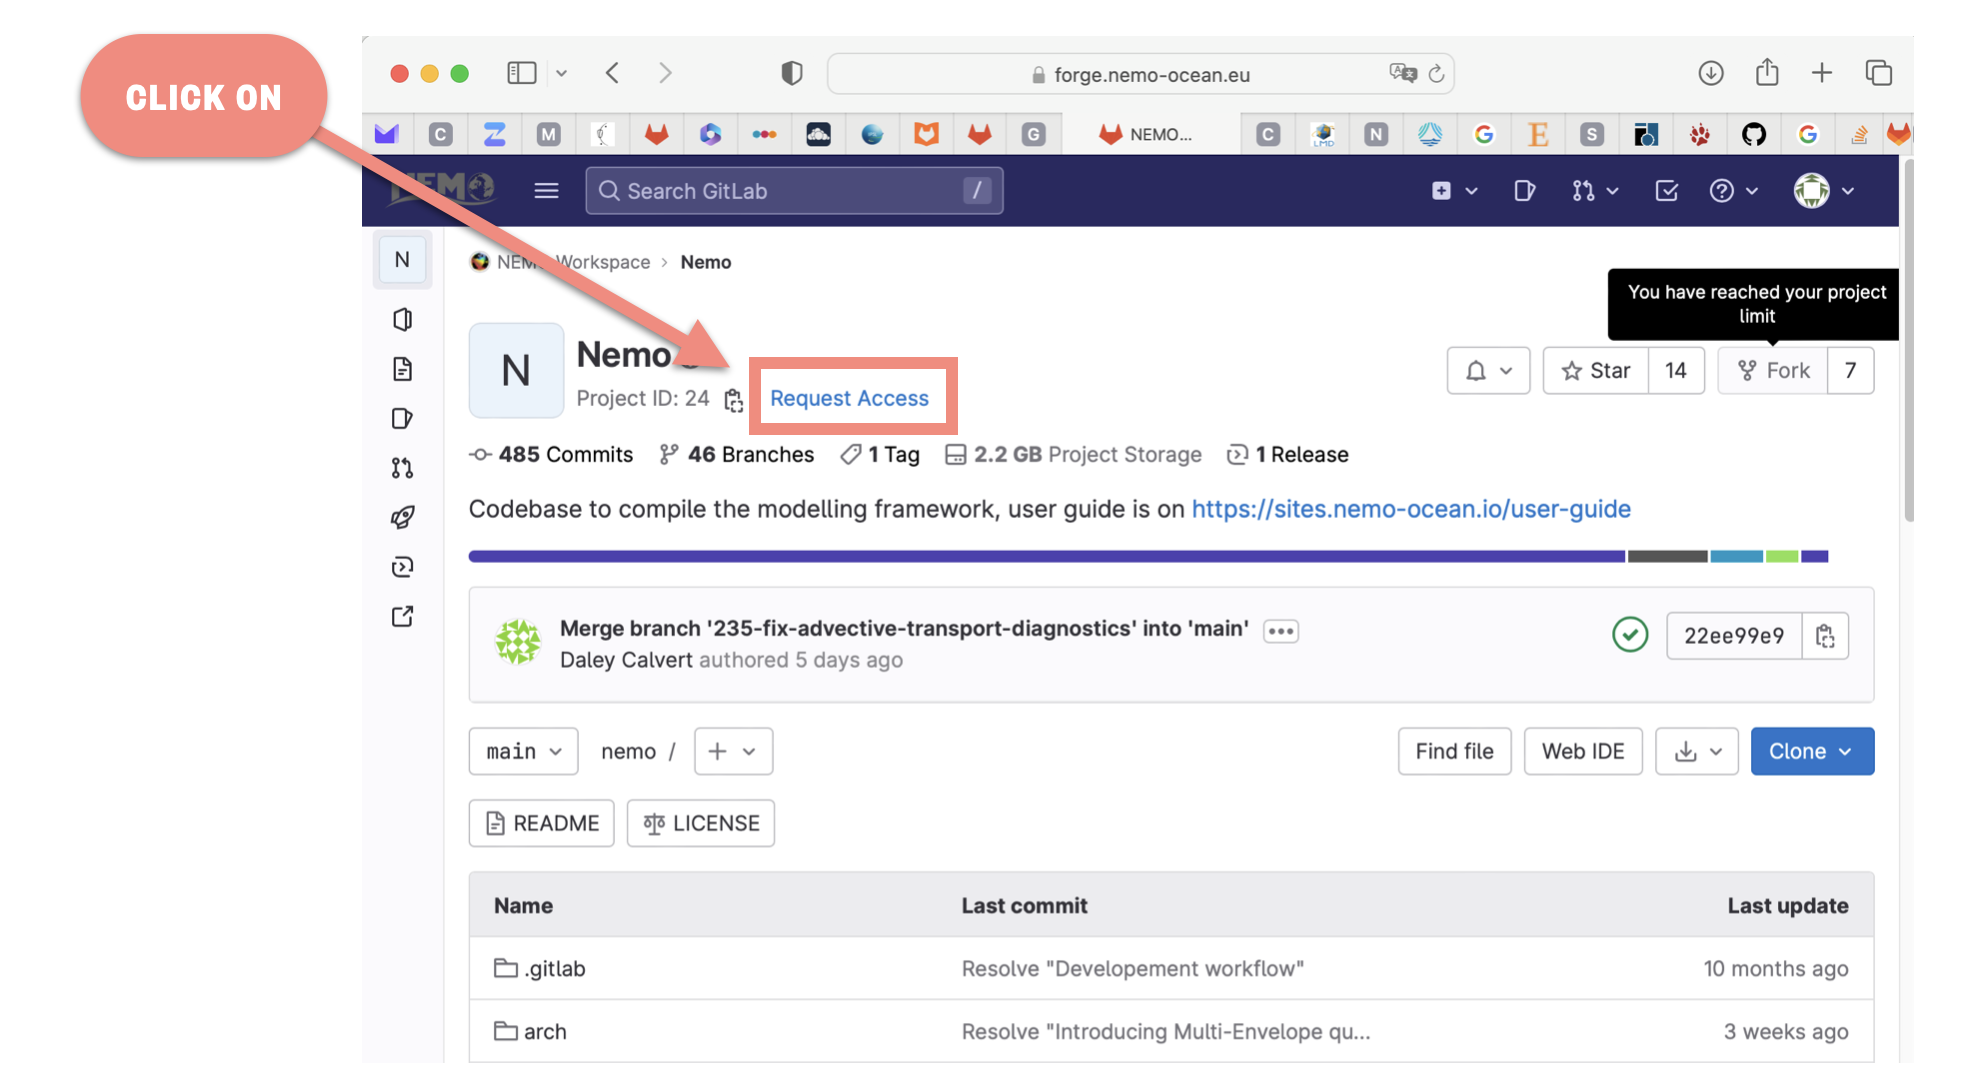
Next you need to request developer access to the External Contributors fork

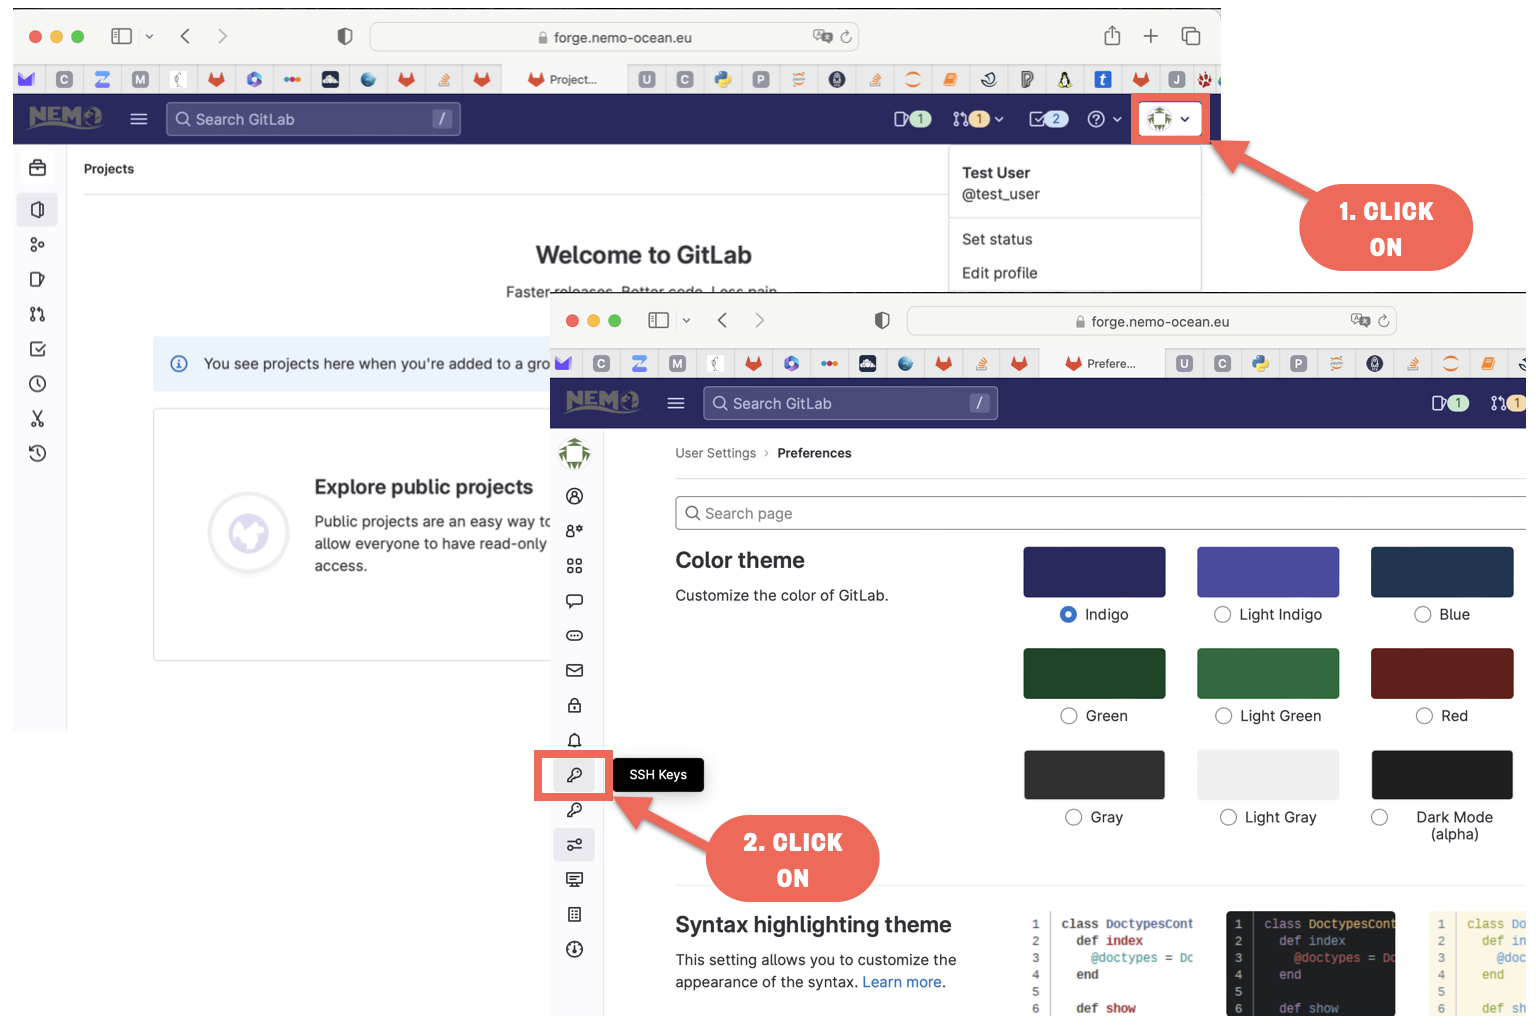
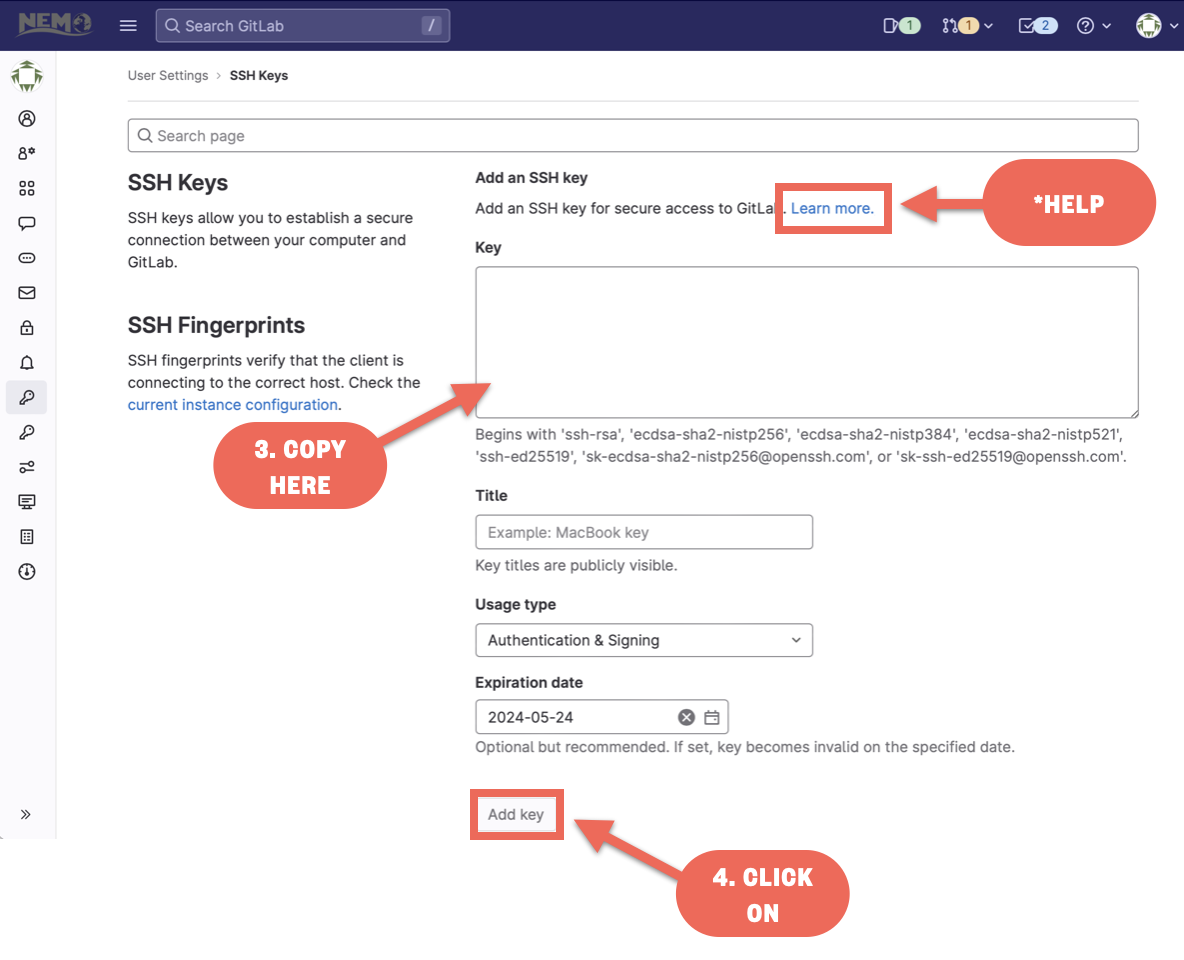
- Link with your local machine using an SSH key
To generate an ssh key on the machine that you work on:
ssh-keygen -t ed25519Then copy the public key to your account on the NEMO Forge under your profile preferences
Step 5: Your own branch on the NEMO External Contributors fork
Under the External Contributors fork, you can now create your own branch of NEMO and implement your planned developments.
- Create an issue
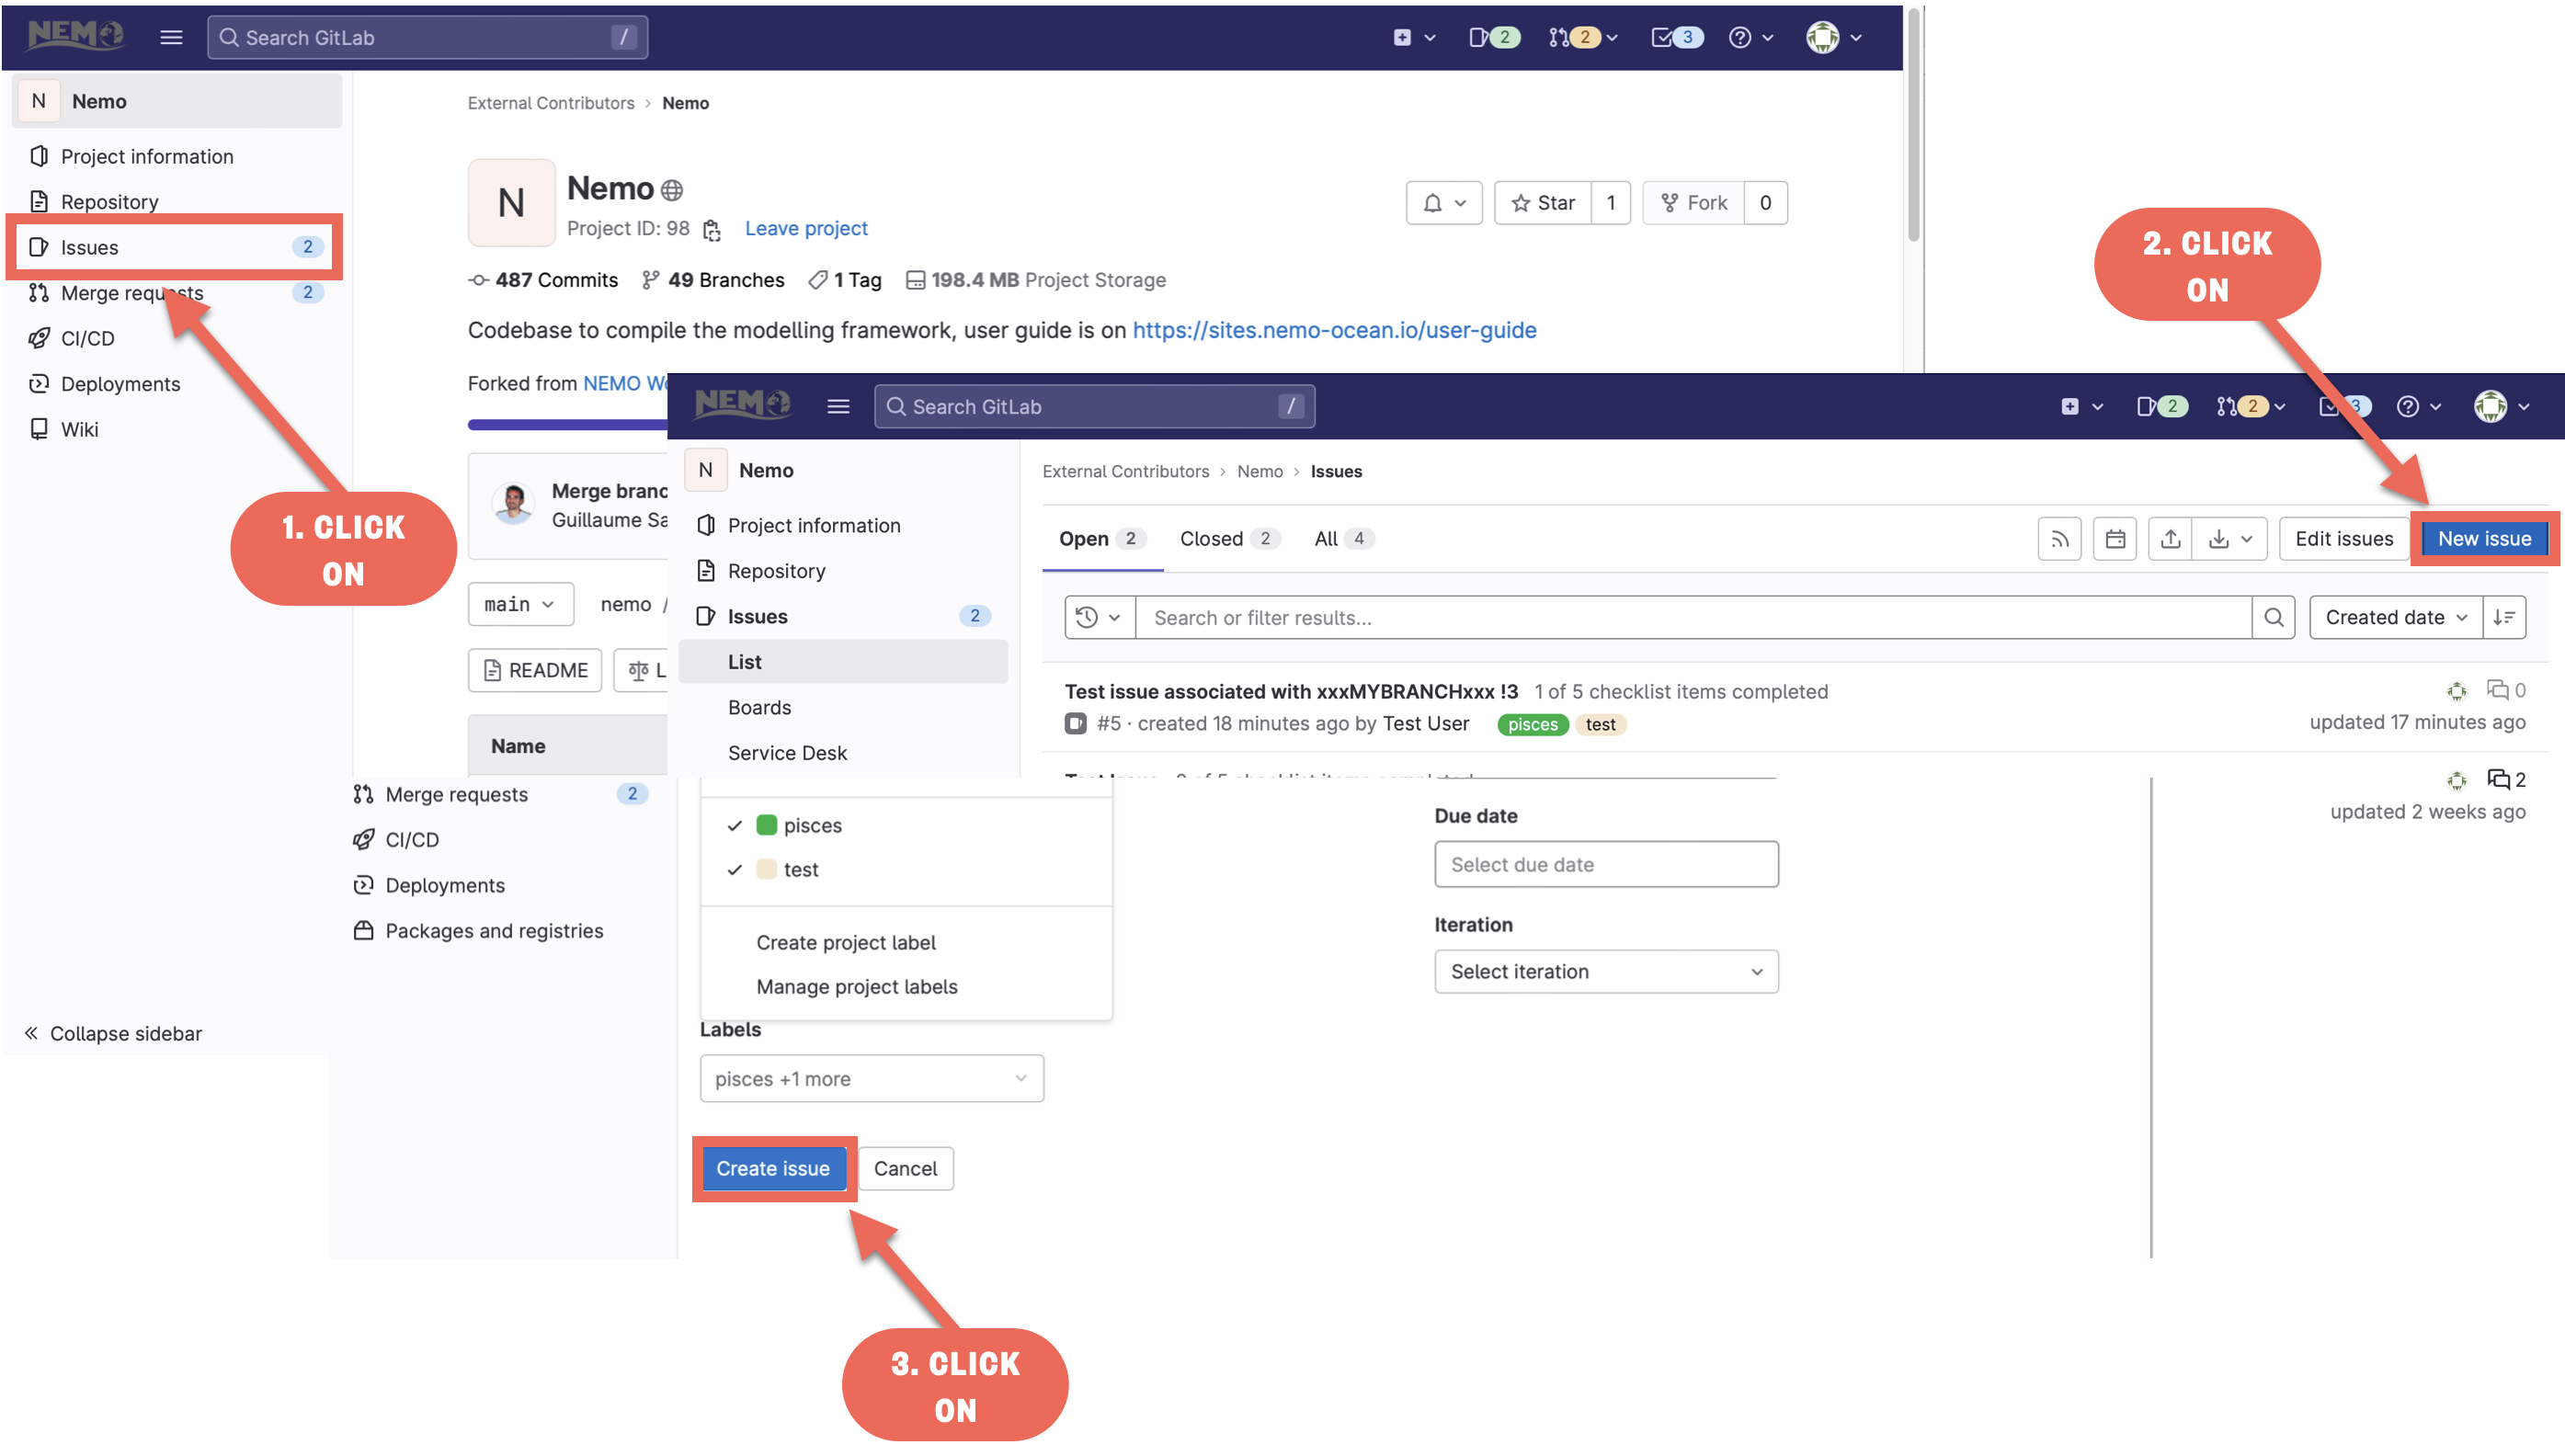
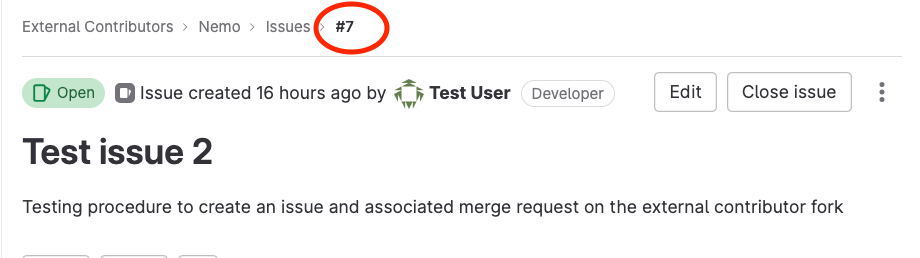
Here is an example of an issue that was created to test this procedure:
- Create a branch corresponding to this issue
On your local machine clone the external contributor repository:
git clone git@forge.nemo-ocean.eu:extdevs/nemo.git nemo
cd nemo
Now create a branch starting with the number that corresponds to the issue you created. In the above example it created issue number 7
git branch Fork-7-the-name-of-your-branch
git switch Fork-7-the-name-of-your-branch
git push -u origin Fork-7-the-name-of-your-branch
You now have an issue and branch that are linked and can proceed with your developments.
Step 6: Make changes to your branch on your local machine
- Make sure that you are in the right branch (yours should be green with an asterix next to it)